
In January 2023, Fantech released its latest 75% mechanical keyboard with customizable OLED display, MAXFIT81.
I received a review unit, a barebone unit with stabilizers, no switches or keycaps. However, this doesn’t reflect on my actual review, and I wish to give an unbiased take on the keyboard.
UNBOXING
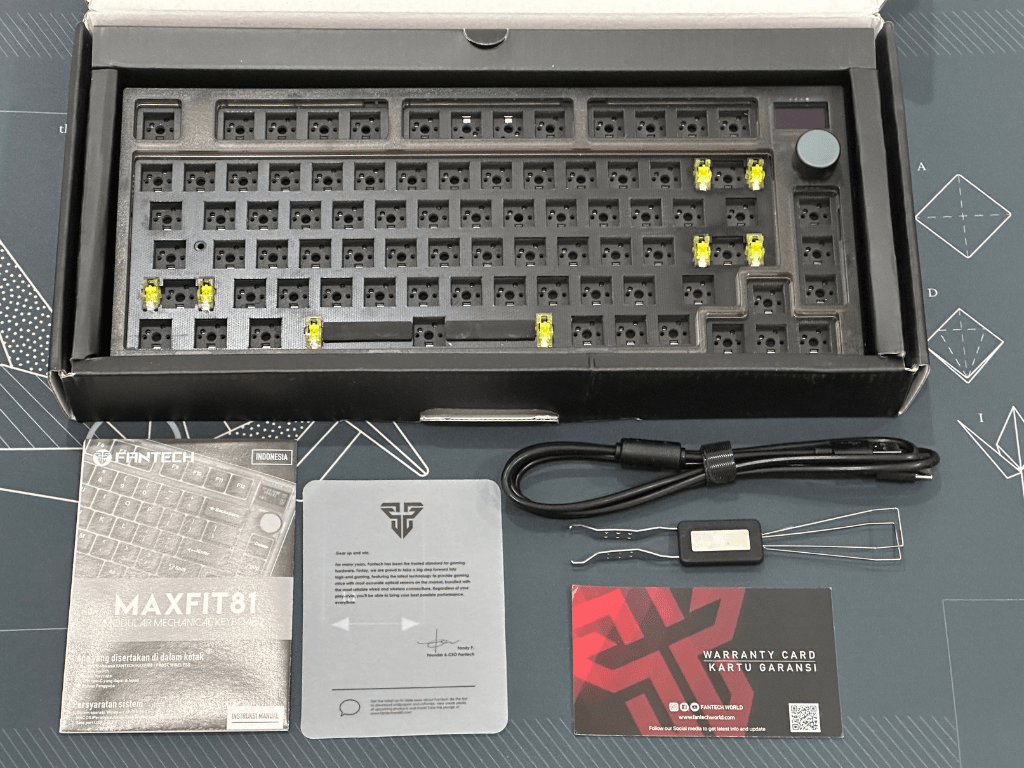
What’s in the box:
1. MAXFIT81 Mechanical Keyboard with knob and customizable OLED display, stabilizers installed
2. User Manual
3. Warranty Card
4. 2-in-1 Switch and Keycap Puller
5. USB Type-C Cable
6. 2.4Ghz Strikespeed Wireless dongle
The default mode is WINDOWS mode, but you can change to MAC OS mode by pressing these combinations:
Fn+A WIN Mode
Fn+S MAC Mode

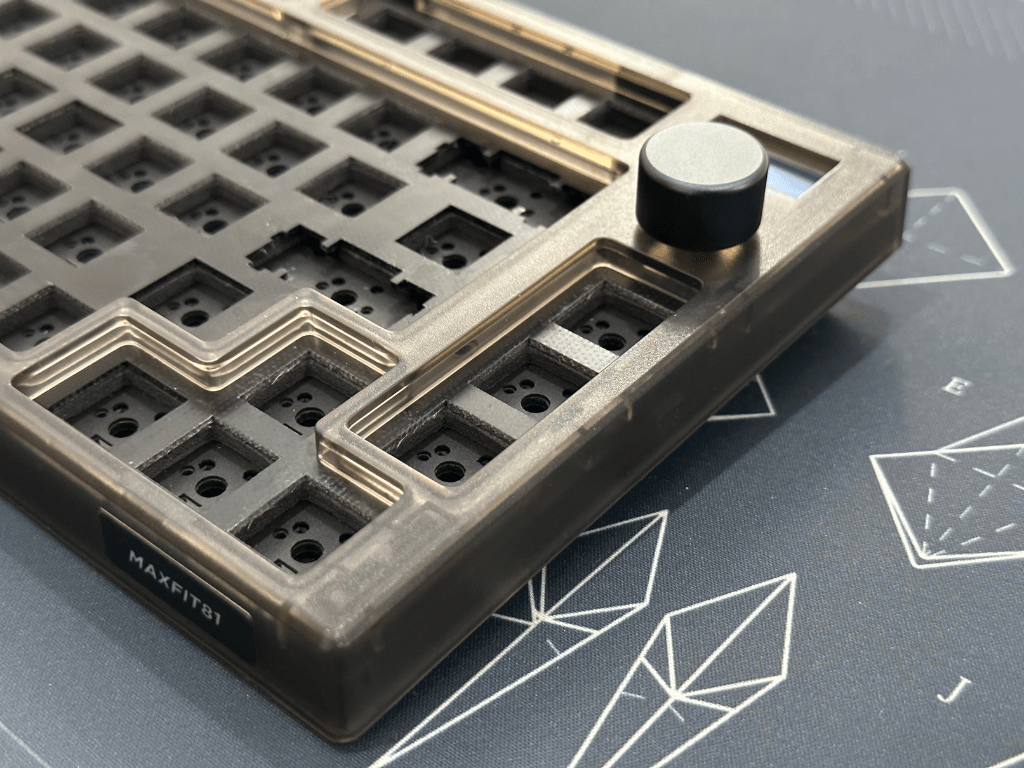
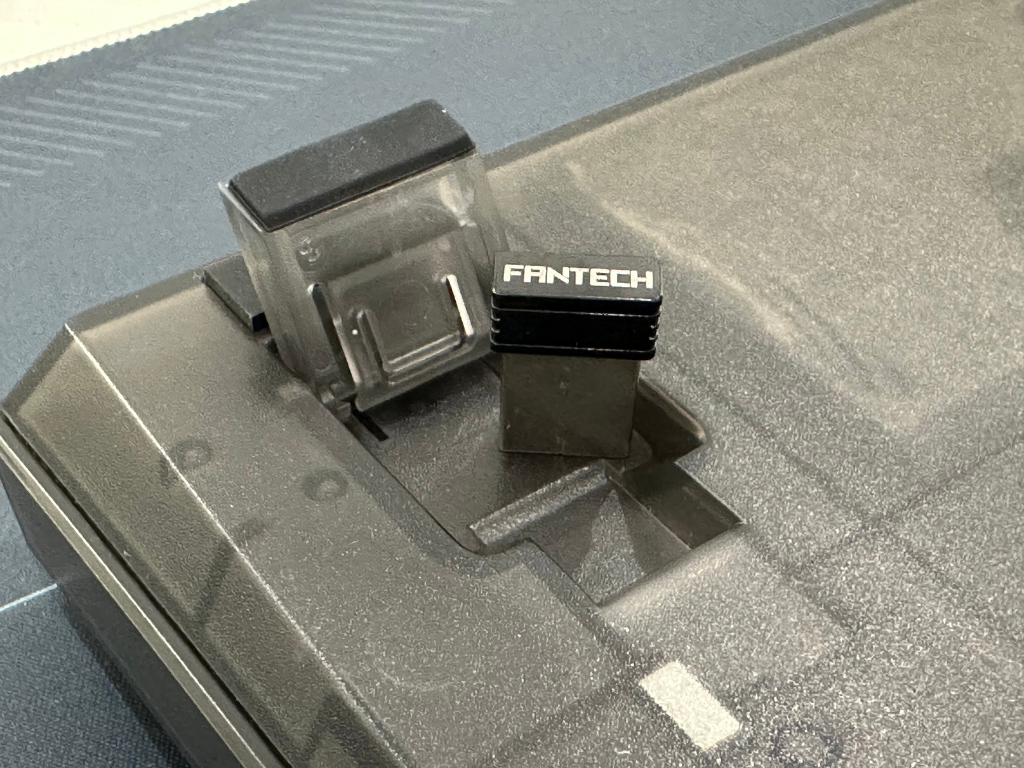
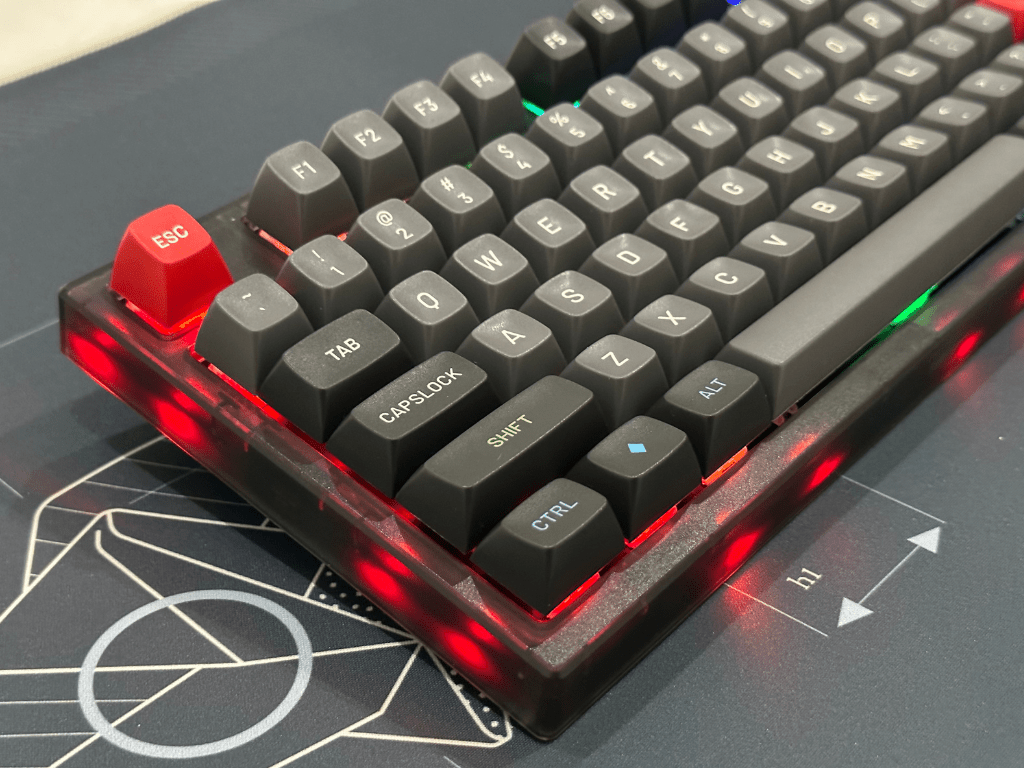
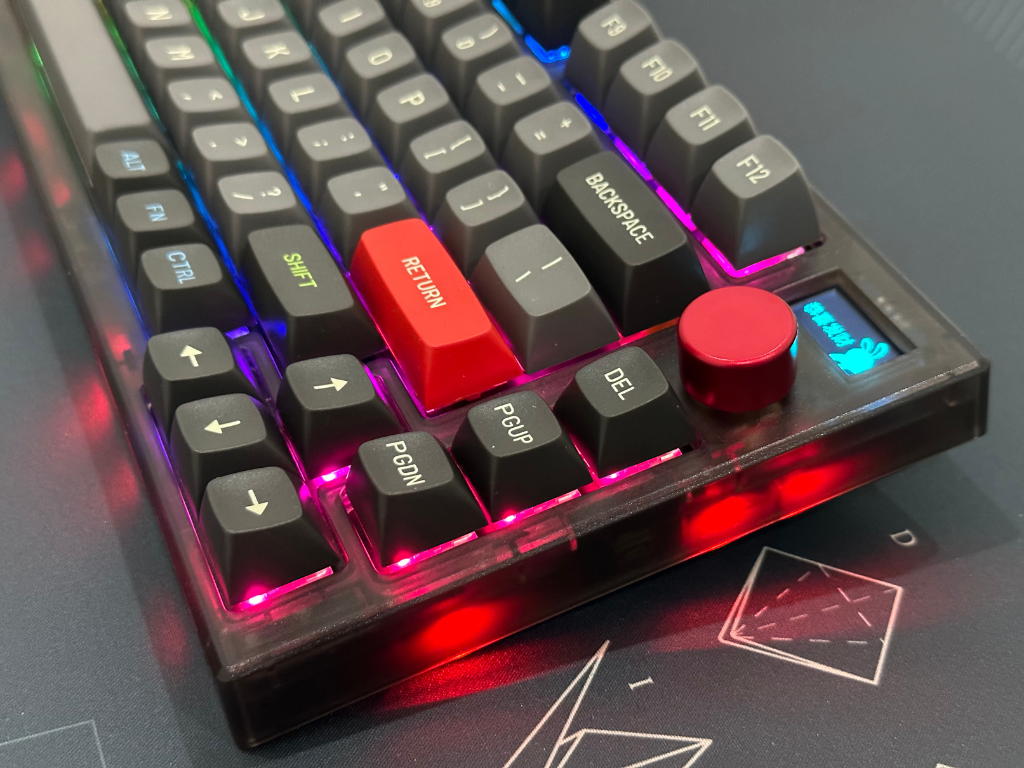
The case is made of ABS with a transparent frost look, available in frost white or smokey black. The unit comes with silver or black knob, depending on the color of the case.
The default functions of the knob are MUTE, VOLUME UP, and VOLUME DOWN, but you can set it for different functions using Fantech software.
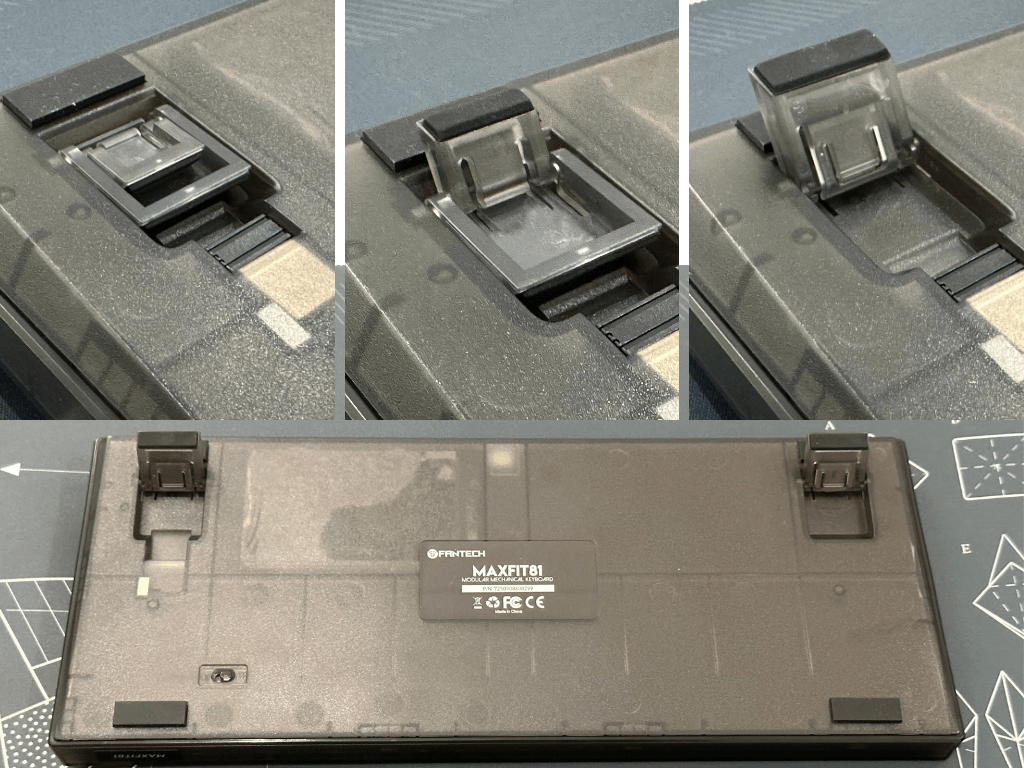
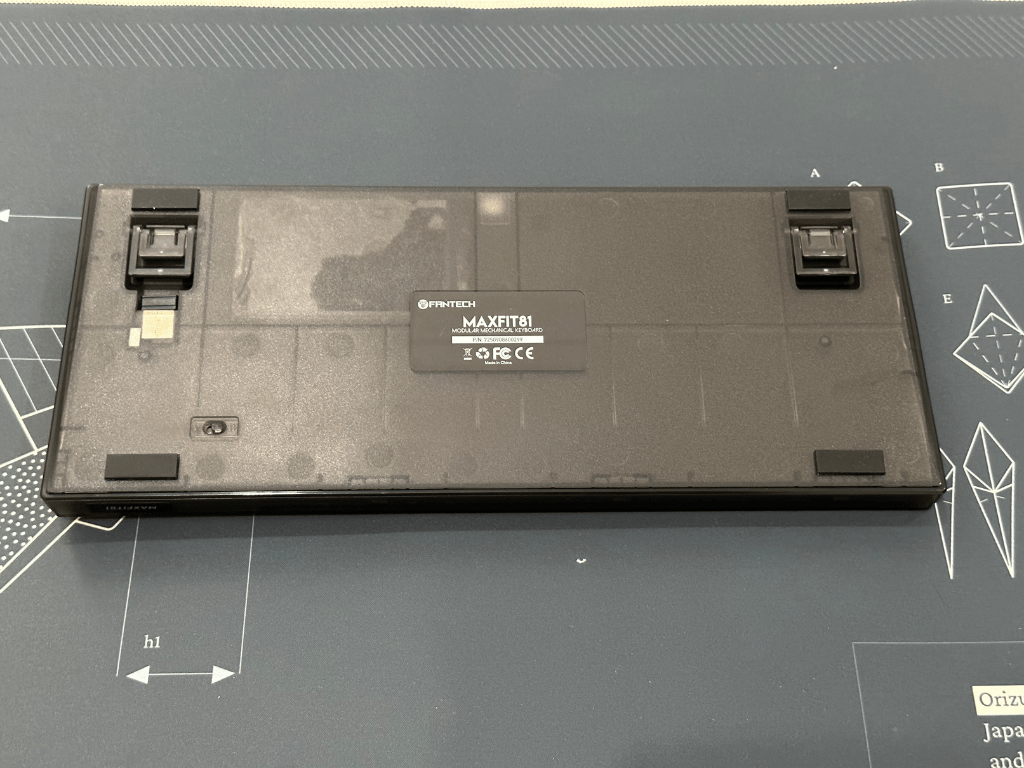
MAXFIT81 comes with two height adjustment feet that you can adjust to your preference.
CONNECTIVITY AND BATTERY
MAXFIT81 comes with three methods of connection:
1. Wired using the included USB Type-C cable
2. Strikespeed Wireless 2.4Ghz using the USB dongle
3. Bluetooth 5.0 that can pair with three different devices
If you want to use the wireless connection, remember to turn on the wireless button at the bottom of the case.
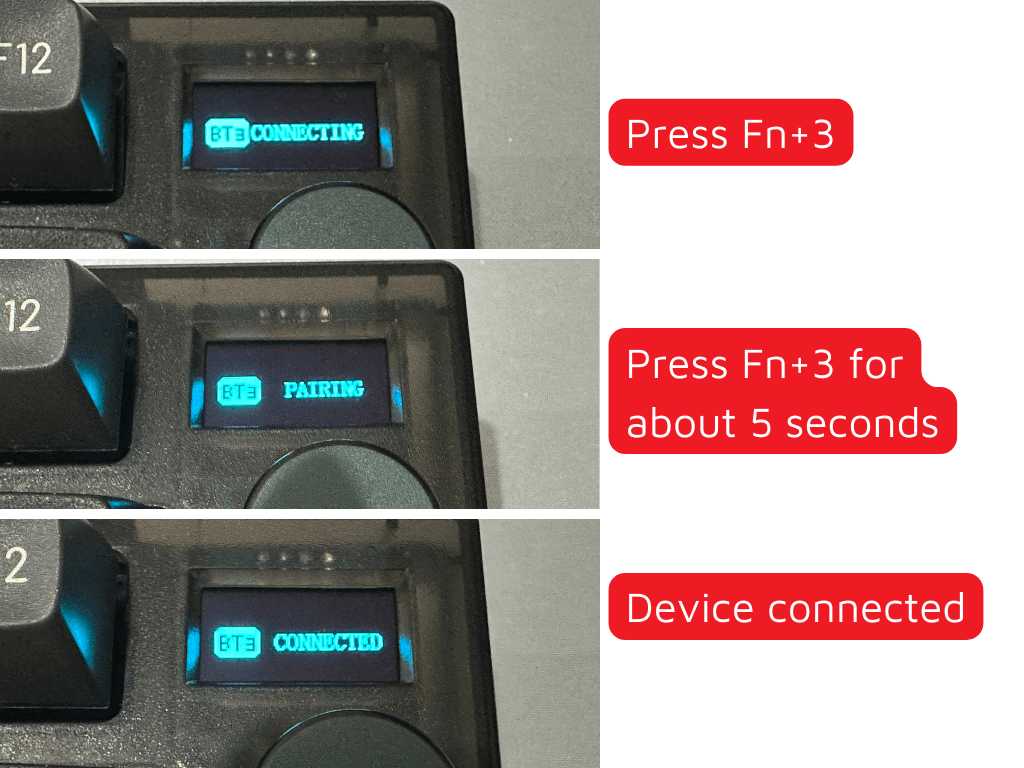
If you want to use Bluetooth, press Fn+1/2/3. You can see the process on the OLED display as shown below:
If you want to change to another device, press:
Fn + 1/2/3 (Bluetooth connection)
Fn + 4 (wireless 2.4Ghz)
Fn + 5 (wired)
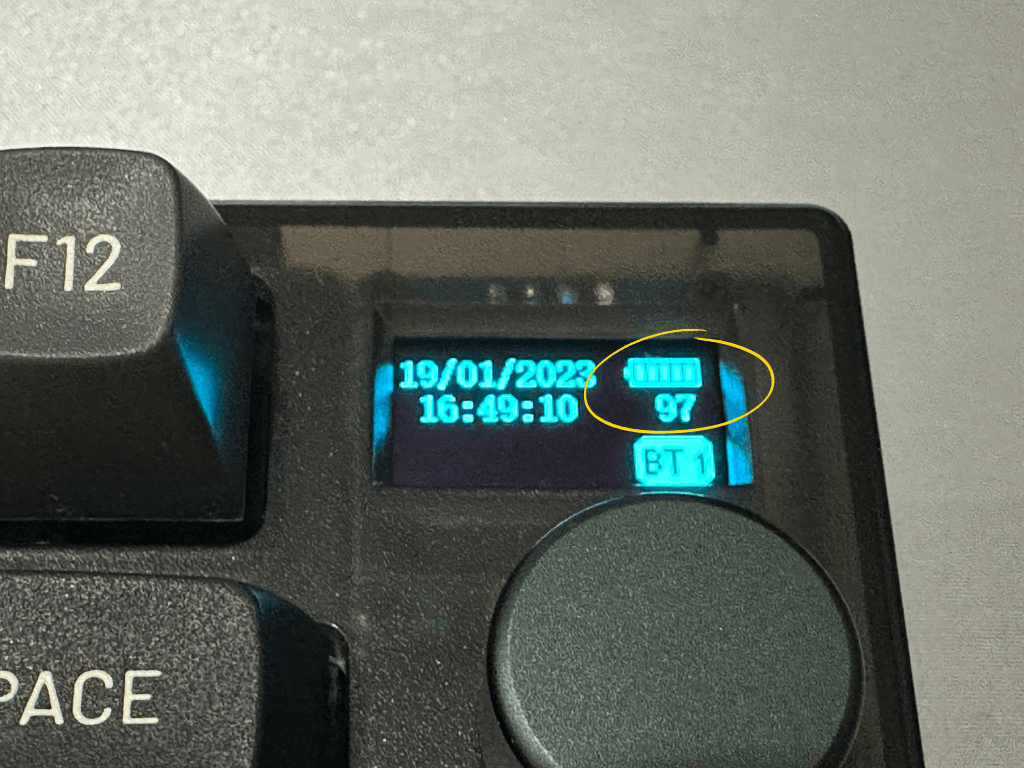
The battery capacity of MAXFIT81 is 4000mAh. On the OLED display, you can see how the battery percentage, and while charging it will even show an animation.
According to Fantech, the battery can last up to 165 hours without using RGB, or up to 14 hours with full RGB. I have not fully tested it myself, because I have only used it for a couple of days. For example, this morning I started with 100% battery at 7AM, now at 4PM it is 90%. I’ve used it for browsing, chat and drafting this article with full RGB.
KEYCAP and SWITCH
I cannot review the switch and keycap because I only have the barebone version, however according to information from Fantech, there are few options:
1. Barebones
2. ABS keycaps (like MAXFIT61 FROST + Outemu Switch – Red or Blue)
3. PTB keycaps (like MAXFIT67 + Gateron Pro v2 Switch – Yellow, Brown, or Blue)
If you do not like the switch, you can replace it with any mechanical keyboard switches you like because MAXFIT81 has universal hotswap, compatible with both 3 pin or 5 pin switches.
Since the PCB is South Facing, you can use any keycap profile (SA, MT3, OEM, Cherry) without any risk of interference, especially when using Cherry profile keycap.
STABILIZER
Stabilizers that come with MAXFIT81 are the same as MAXFIT67’s. They need no clipping, only relube if you want to get a customized feel. I relubed the housing and stem with Krytox 205g0. You can relube the wire using Krytox 205g0 or Permatex.
MAXFIT81 supports PCB mount stabilizers, unfortunately the plate cut is not big enough, therefore does not support aftermarket stabilizers like Durock, TX, nor Cherry. I would recommend using the plate mount stabilizer for simplicity and compatibility.
INTERNAL MAXFIT81
WARNING: Opening the case may void warranty. Proceed at your own risk.
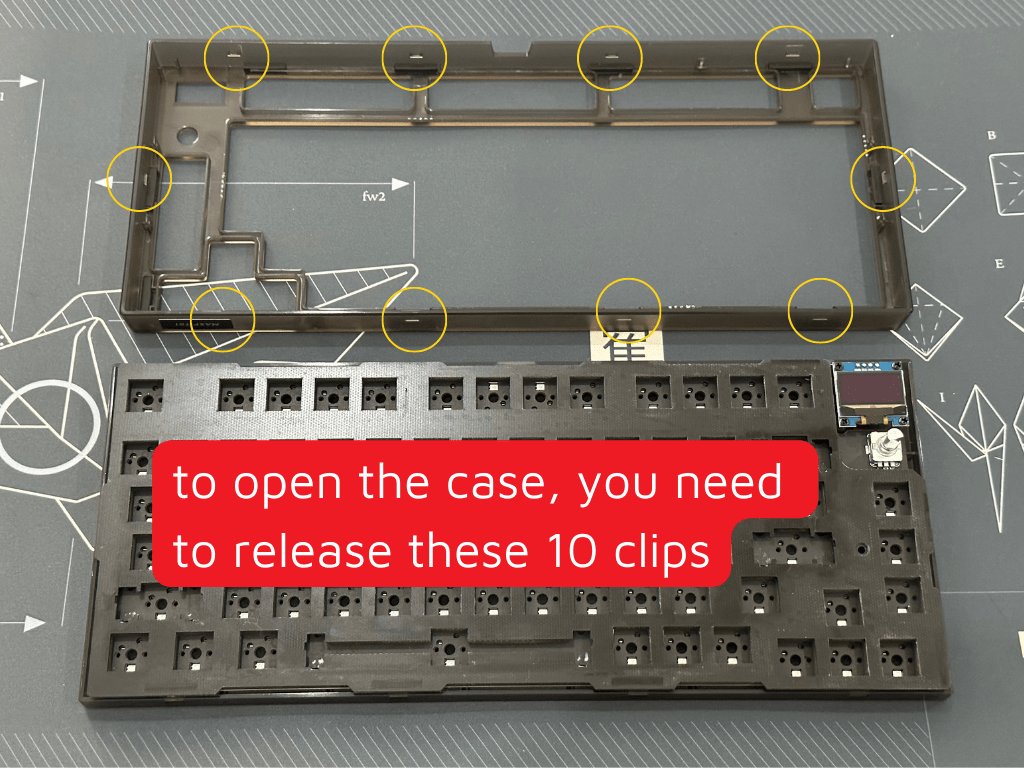
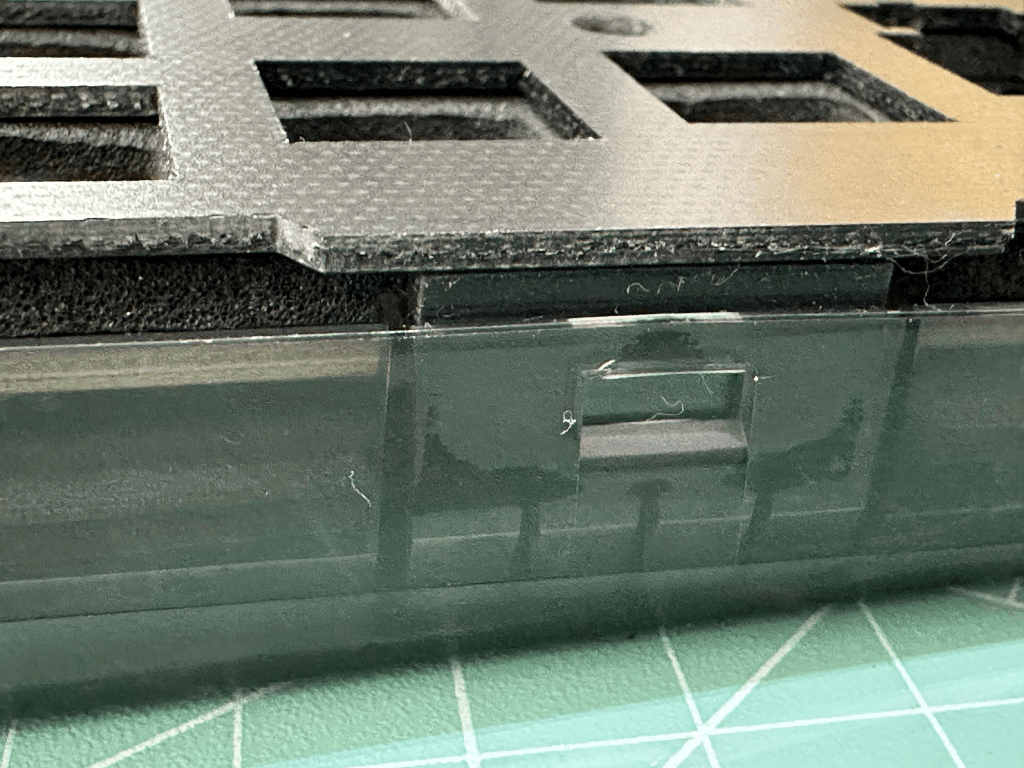
To open the case, you need to release these 10 clips. It is preferable using plastic pick, so you won’t damage the case.
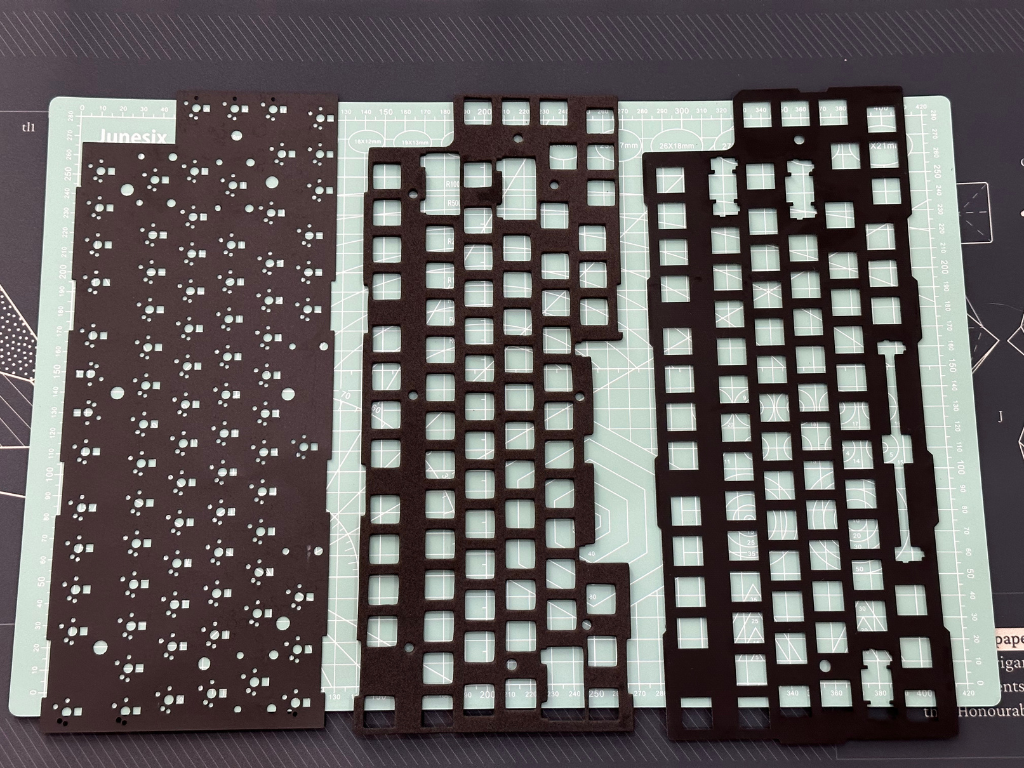
After removing the top case, you can see the layers:
Plate
The plate is made of FR4. It is new and different from earlier iteration of Fantech MAXFIT series keyboards that use steel plate. FR4 makes the keyboard sound lower than using material like steel or aluminum, however it is not as low as using polycarbonate or POM plates.
Plate Foam
The plate foam is made of EVA foam.
PCB Foam
The PCB foam is made of poron. This PCB foam modification is made popular by Owlab keyboards, and can be removed if you don’t like the sound.
PCB
If you are going to lift the PCB from bottom case, please be careful because there are cables connecting the PCB with battery and OLED display.

Underneath the PCB, there is another EVA foam that acts as case foam to fill the space and reduces hollow sounds. If you want to remove the case foam, you need to remove the four screws of OLED display, or cut the foam if you don’t want to unscrew them.
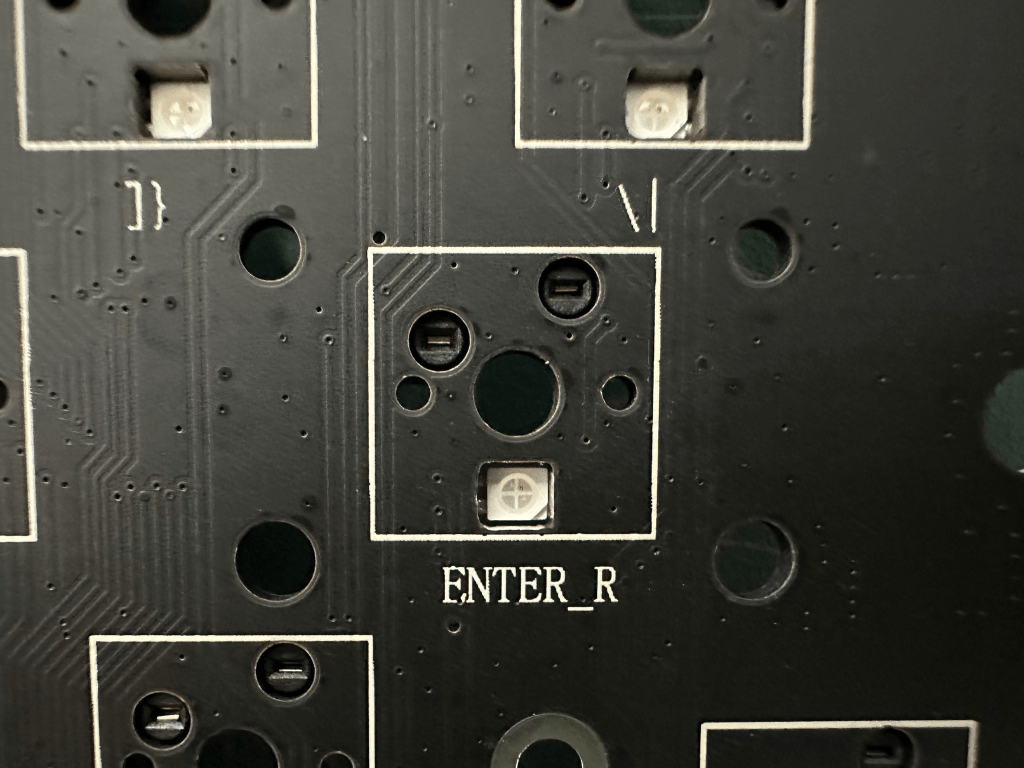
Back to PCB, it is south facing. Only F6 and F7 are north facing to accommodate the USB port. You do not need to worry about interference because it would only occur on the ASDF-Enter row and only if you are using Cherry profile keycap.
PCB is universal hotswap, using CIY+ hotswap sockets.
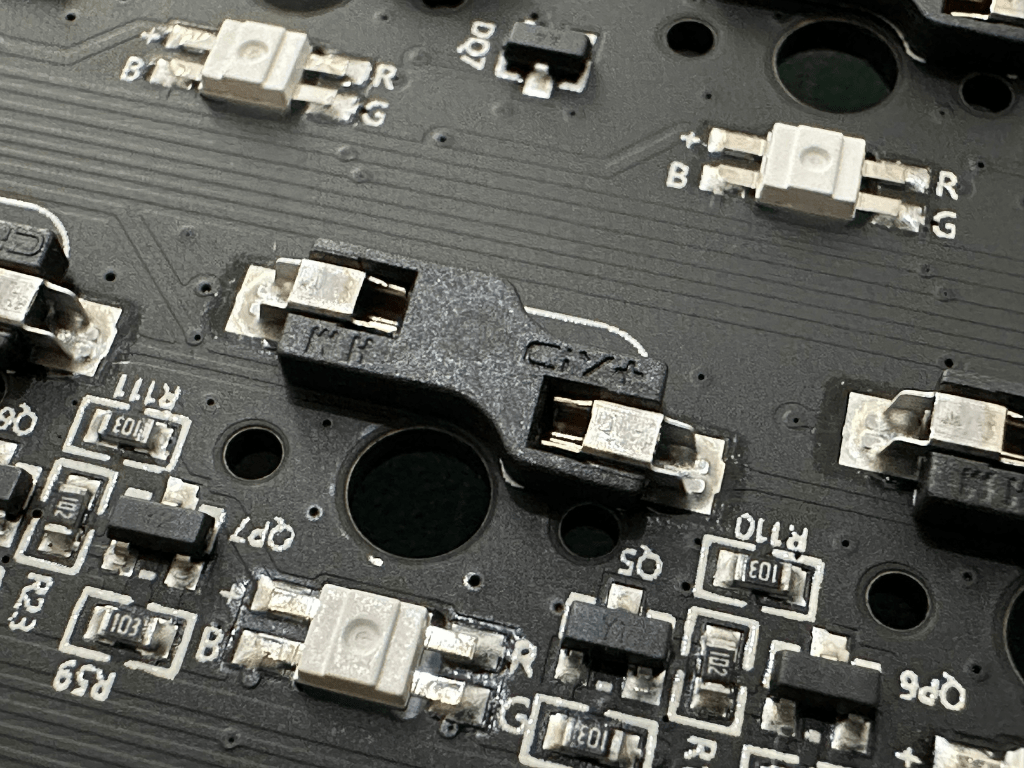
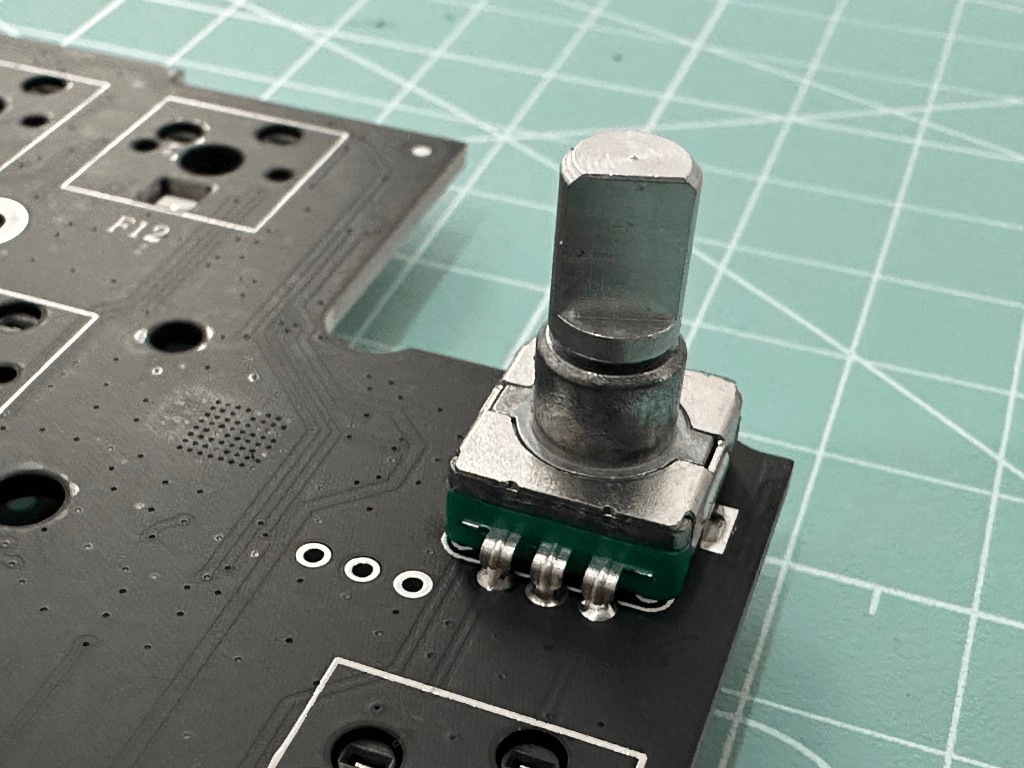
The knob is also integrated with the PCB.
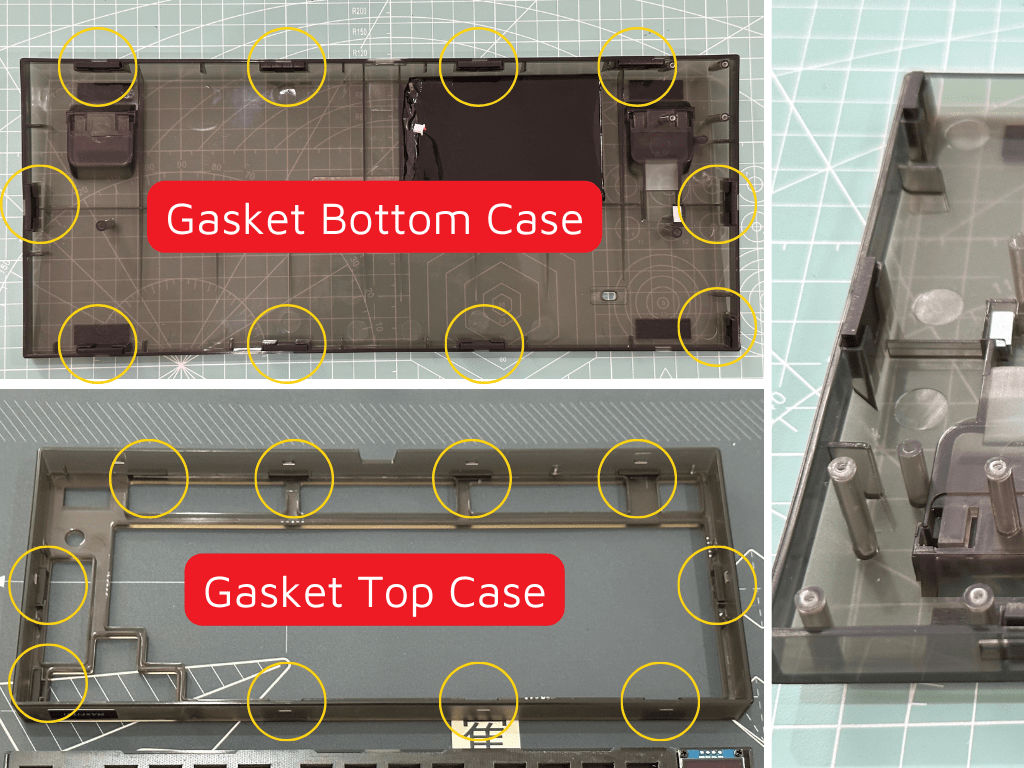
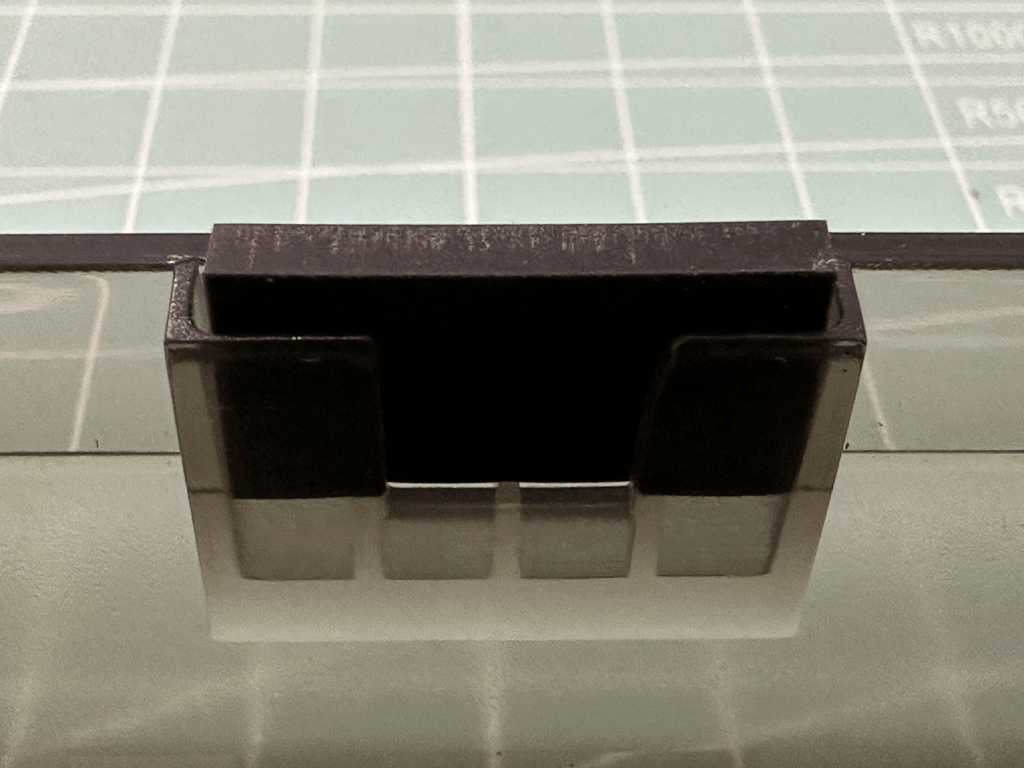
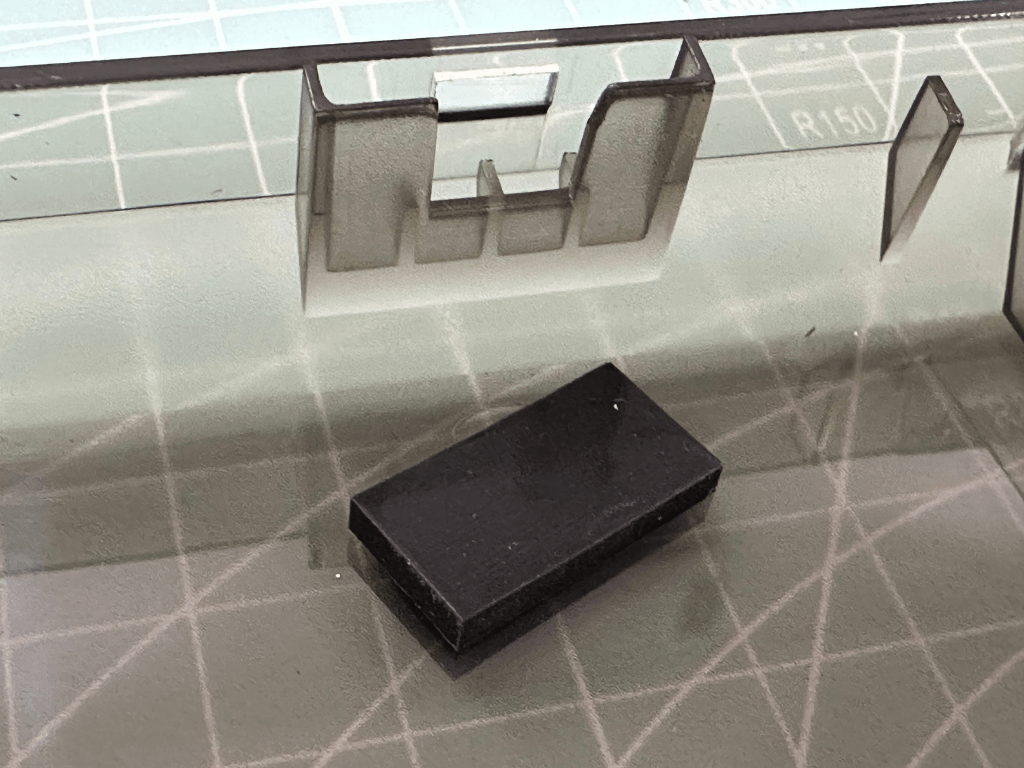
MOUNTING
MAXFIT81 is a gasket mount keyboard, however it is quite stiff because it uses silicone gasket instead of softer poron gasket. Some people think that gasket mount has to be flex or bouncy, but it does not have to be. The most important function of gasket mount is to give uniformity of feeling across the whole keyboard and make the bottom out feel a bit softer.
If you like stiff gaskets, love using tactile or clicky switch, then MAXFIT81 is for you.
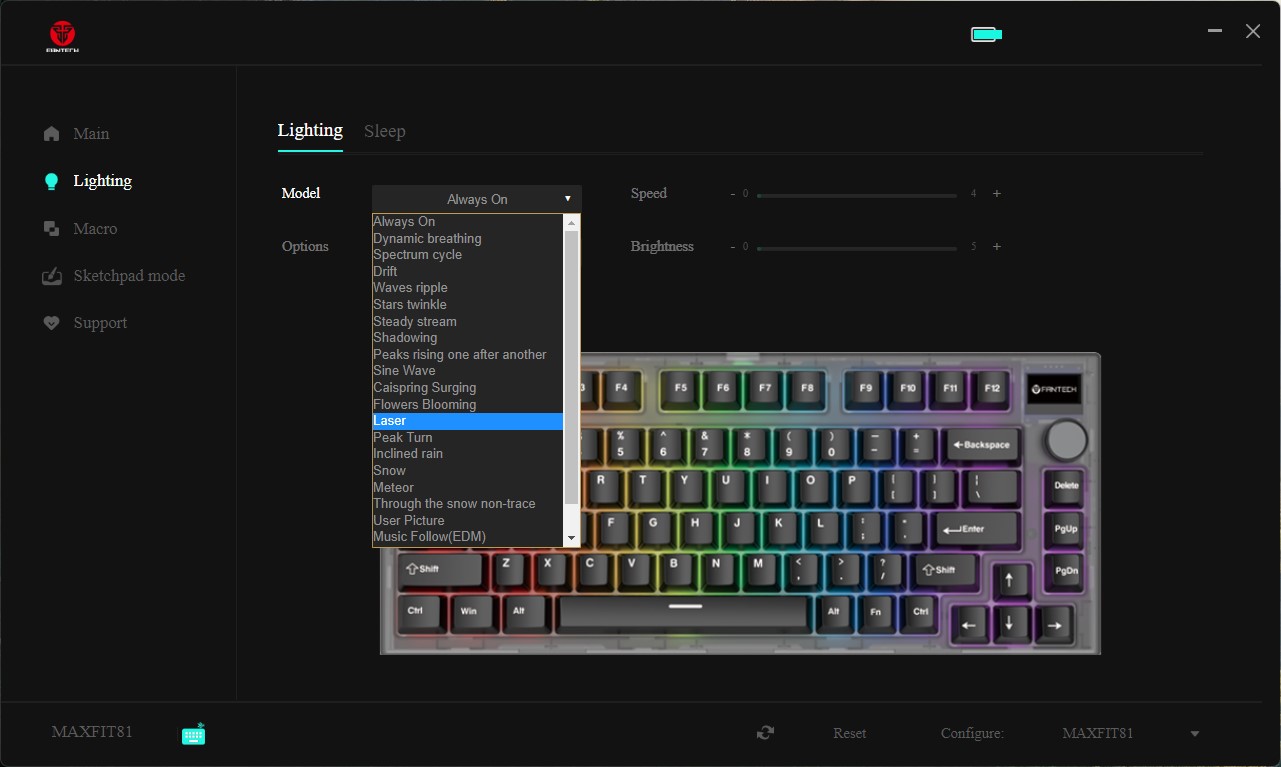
RGB
MAXFIT81 comes with LED case and per key RGB. Since the case is semitransparent, you can enjoy the case lighting. The included manual also covers the details regarding changing the colors.

Customizable OLED Display
The most interesting feature of MAXFIT81 is the customizable OLED display.
To cycle through available information on OLED display, press Fn+Left CTRL
1. Date, time, battery capacity, connection
2. Disk capacity
3. CPU temperature
4. Memory
5. Customized Mode Some information like disk capacity, CPU temperature and memory are only available in wired mode.
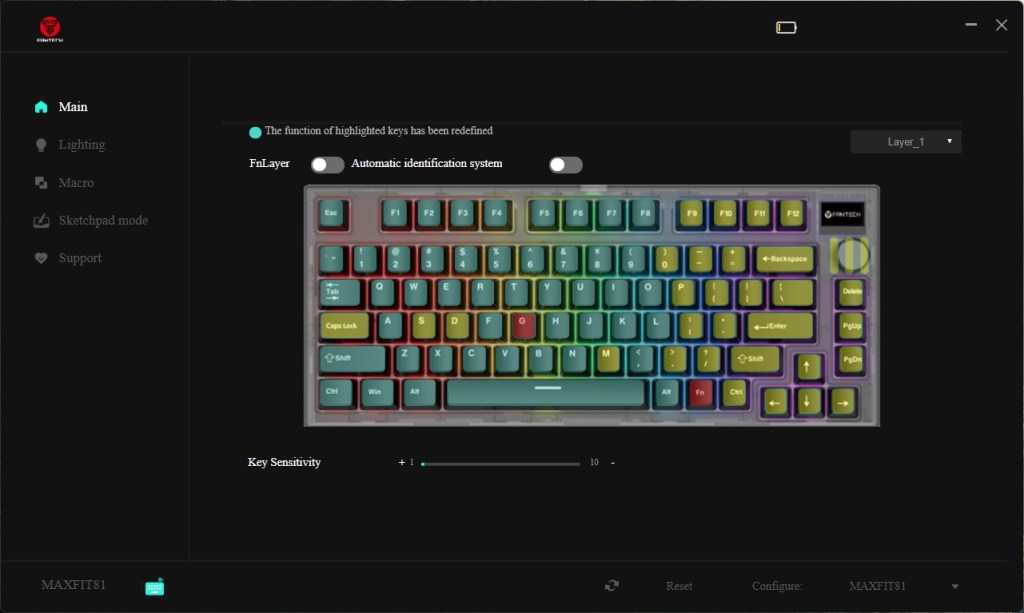
You can customize the OLED display using Fantech Core software. The software can also be used to remap keys and knob function, creating macro, customizing RGB light, etc.
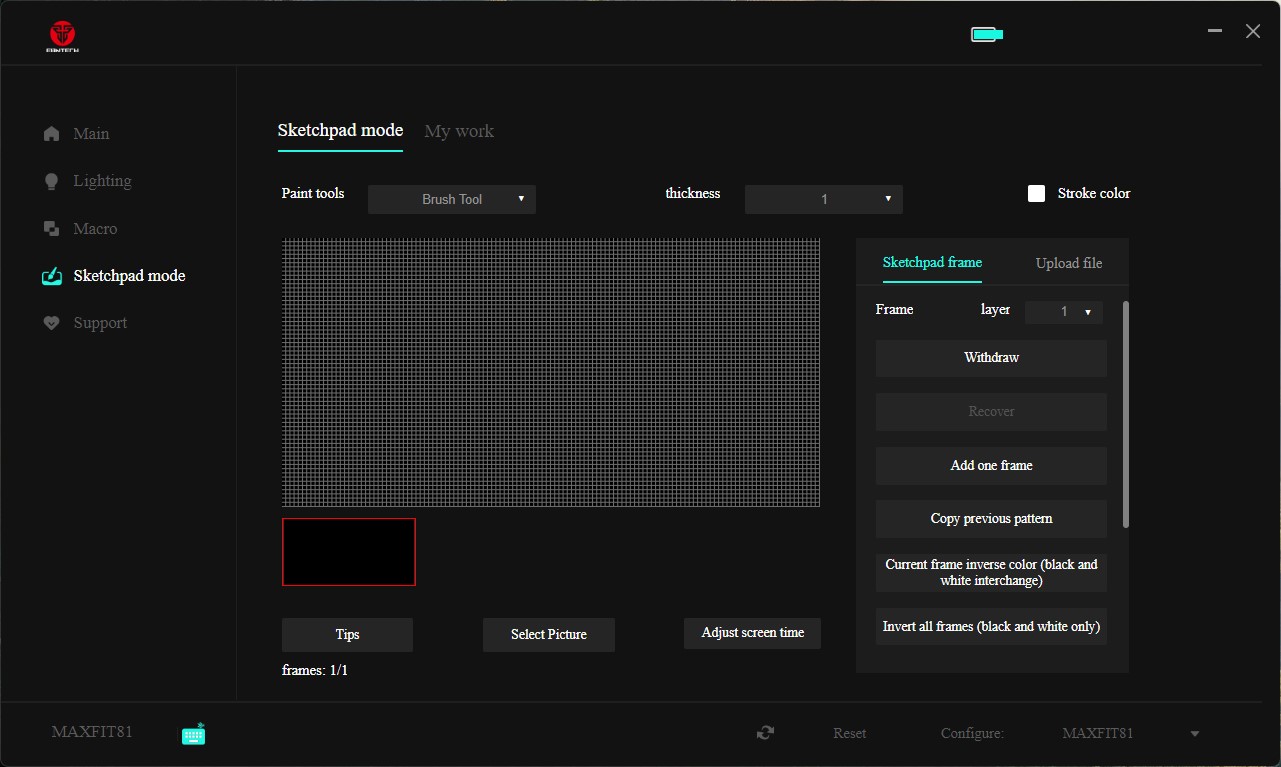
To create animations, you can do it free hand using the software or the easiest route is to prepare the frames in advance using other program, then upload them to the keyboard. If you want to use other application to create the frame, the size of the OLED display is 128px x 64px


AUDIO SOUND TEST
Below are the link to audio sound tests with different switch and keycap:
Thank you for reading.
I hope this article is beneficial for you.
KEEB Getting Better!
Written by:
Inge Santoso
